
Creating a timeline is an easy and fun way to organize your thoughts.
The process of mapping out time can help you brainstorm timelines for all sorts of projects, from school assignments to family vacations. Here are some tips on how to make creative timelines:
1. Organize the timeline around a central theme.
Choose a topic that you want to be the focus of your timeline, and then organize the other elements on the page according to that theme. For example, let’s say you are creating a timeline about your family history. Your central theme could be the years during which the different generations were born, and you could include items such as births, deaths, graduations, and marriages in their appropriate places on the timeline.
2. Use real objects that represent time.
One fun way to organize your timeline for a school project is to cut out images from magazines or draw pictures that illustrate your theme and place them on the page alongside the text. For instance, if you were organizing a timeline of your favorite movies, each item on the page could be a picture from that movie.
If you’re working with younger children who have trouble drawing, this is a good way to get them to visualize their work without needing advanced artistic skills. You can also create timelines that focus on themes such as the seasons, holidays, and family vacations by using real-world objects to represent time. For example, if you were creating a timeline about vacation photos from the last decade, the items on your page could be digital photos from those trips.
3. Make a list of things that happened in chronological order.
Listing out facts and dates can be a good place to start for any timeline. Create a list of things that happened in chronological order, then add or subtract items as needed based on the selected theme and format.
4. Include key years.
Many timelines include an anchor point at the beginning and end of time represented on the page. For example, many timelines begin with the birth of Jesus Christ and end with the present-day or some other important year.
5. Incorporate color.
Timelines are good places to use different colors to represent things such as time periods and geographical locations. For example, if you were creating a timeline about your elementary school years, you could color-code each school year with a different color. You could also add additional colors to represent important dates such as birthdays and graduations.
6. Represent time through images.
By using photos and other images on your timeline you can create a variety of timelines in which photos take the place of text. If you are working on a particularly long timeline, incorporating photos can help break up the page and make it visually interesting. For example, if your timeline focuses on your family history, you could cut out pictures of each person in the family and paste them onto the page next to their birth date.
7. Create a mini-timeline.
Creating a timeline doesn’t have to be an all-day project. Layout the major themes of time on a single page and add photos, drawings, or other objects where they go on the page. If you’re creating a timeline for your family vacation, for example, you could create a two-page spread that includes key events such as travel dates, sightseeing stops, and favorite attractions.
8. Use graphic design elements.
Timelines are great formats for incorporating more artistic elements such as line work or typography. Work with color to establish mood and find ways to create depth on the page through overlapping images, shapes, and other photo manipulation software tools. For example, if you were creating a timeline for your high school years, you could place color-coded circles over the most important events in your life to form a kind of tiered timeline.
9. Add key dates.
It’s easy to get caught up in visual components when working on timelines. While it’s fun to incorporate images, don’t forget to include important dates and events. Even if it’s just a simple bullet point saying “born,” every date you add will help your timeline feel more complete and give it a better sense of flow.
10. Use multimedia.
Timelines can also be good places to incorporate other multimedia elements such as video, audio, or music. For example, if you’re creating a timeline about your family history, you could include a recorded interview with one of your relatives talking through their life story as the timeline goes along.
Bonus Tip: Create a Timeline Using Venngage.
Venngage is an online timeline maker that allows you to create your timeline from scratch or choose from a wide range of free timeline templates. To give you an idea, here are some timeline examples from their website.

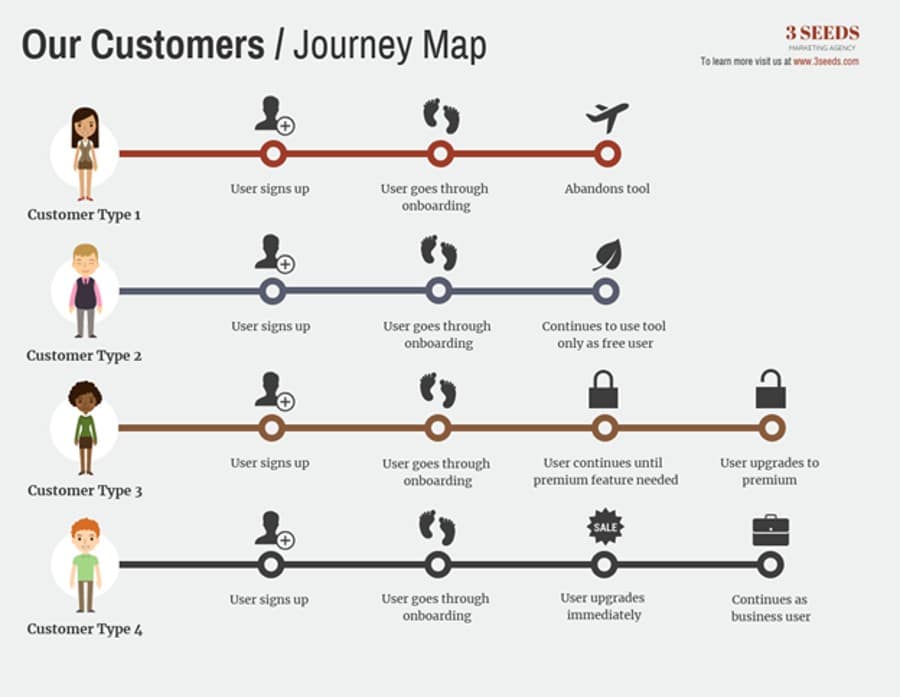
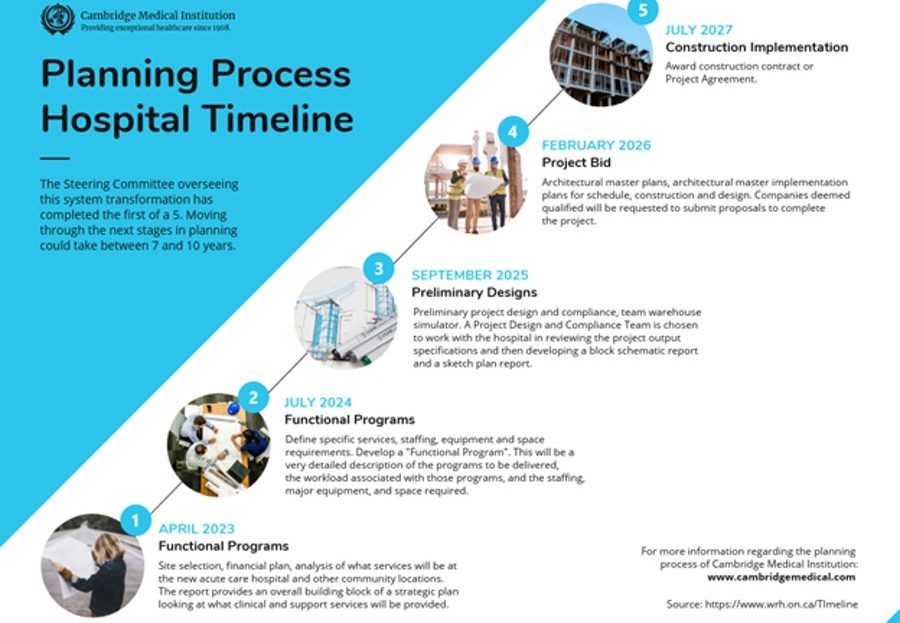
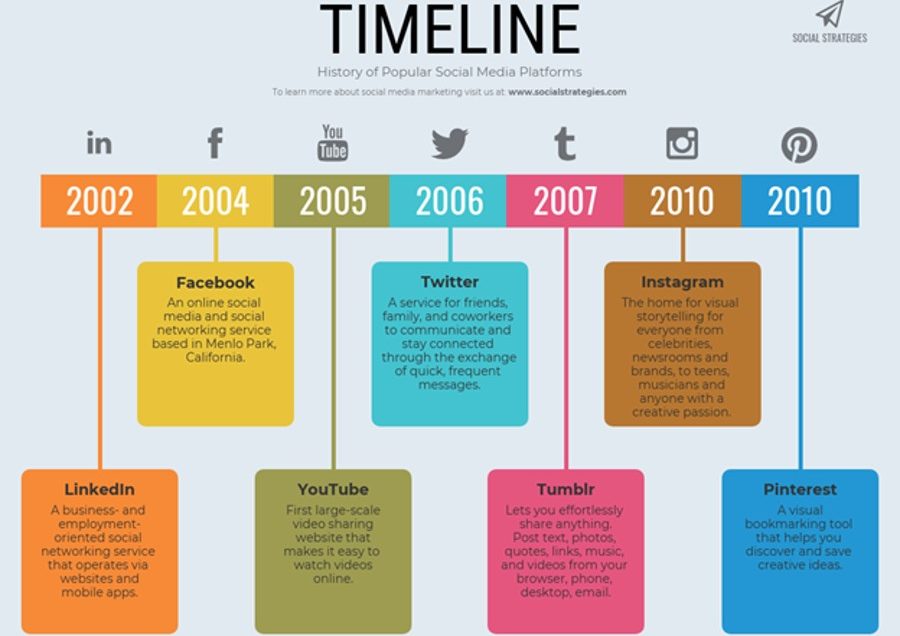
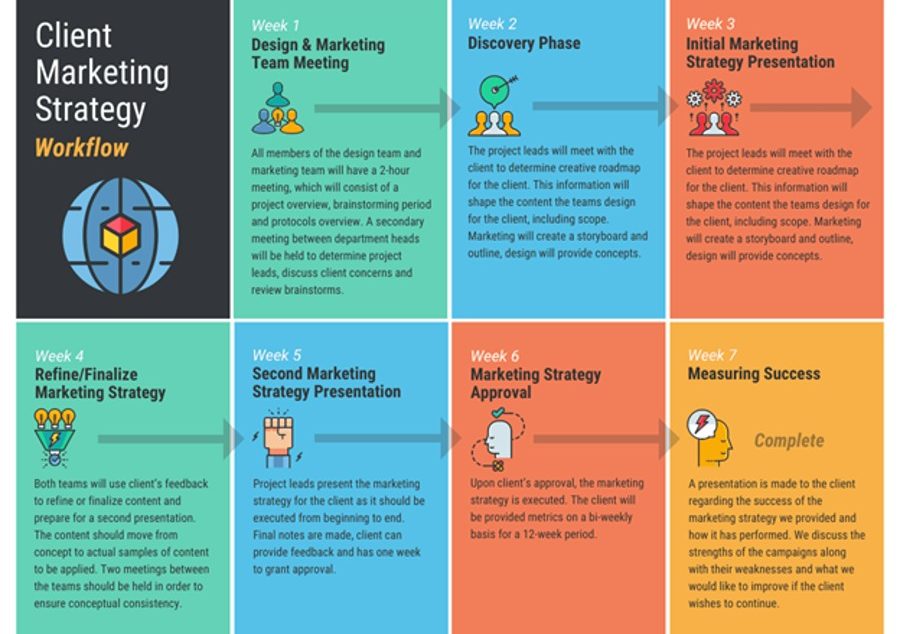
Timelines are good ways to show events from different points of view and give those events context. As long as you keep in mind the length of the timeline and what you plan on representing, you can make a timeline about almost anything. If you are still confused as to how you’re going to make your timeline, don’t forget to check out Venngage. What are you waiting for? Create your timeline and organize your schedule the right way!


